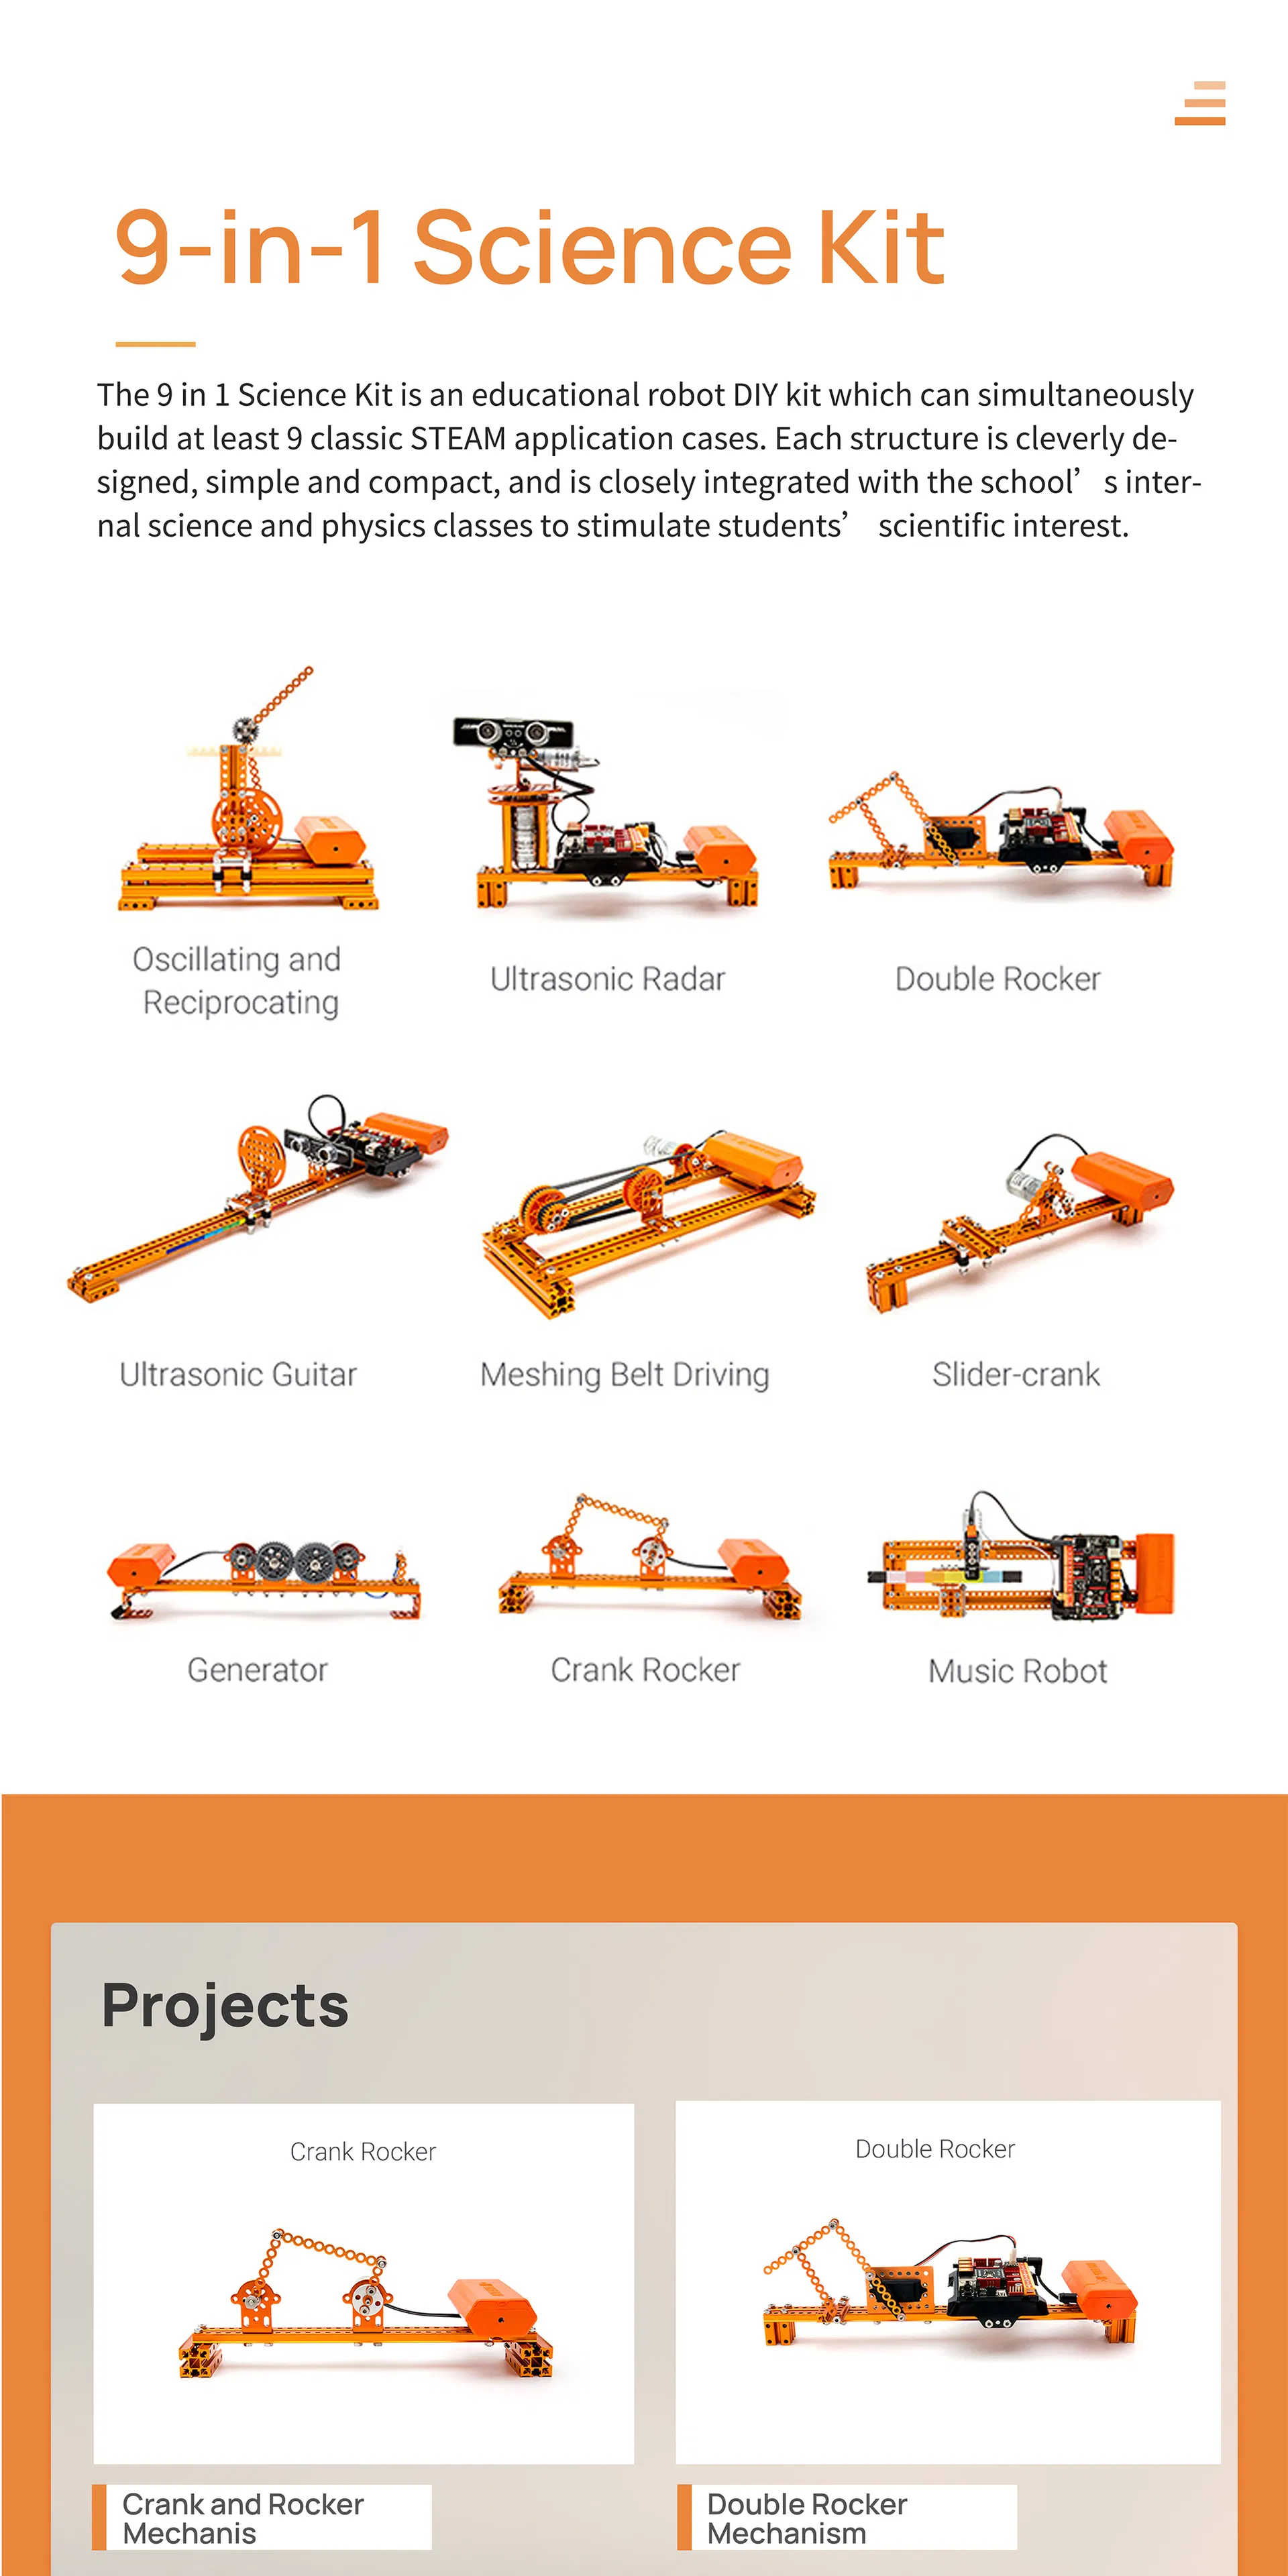
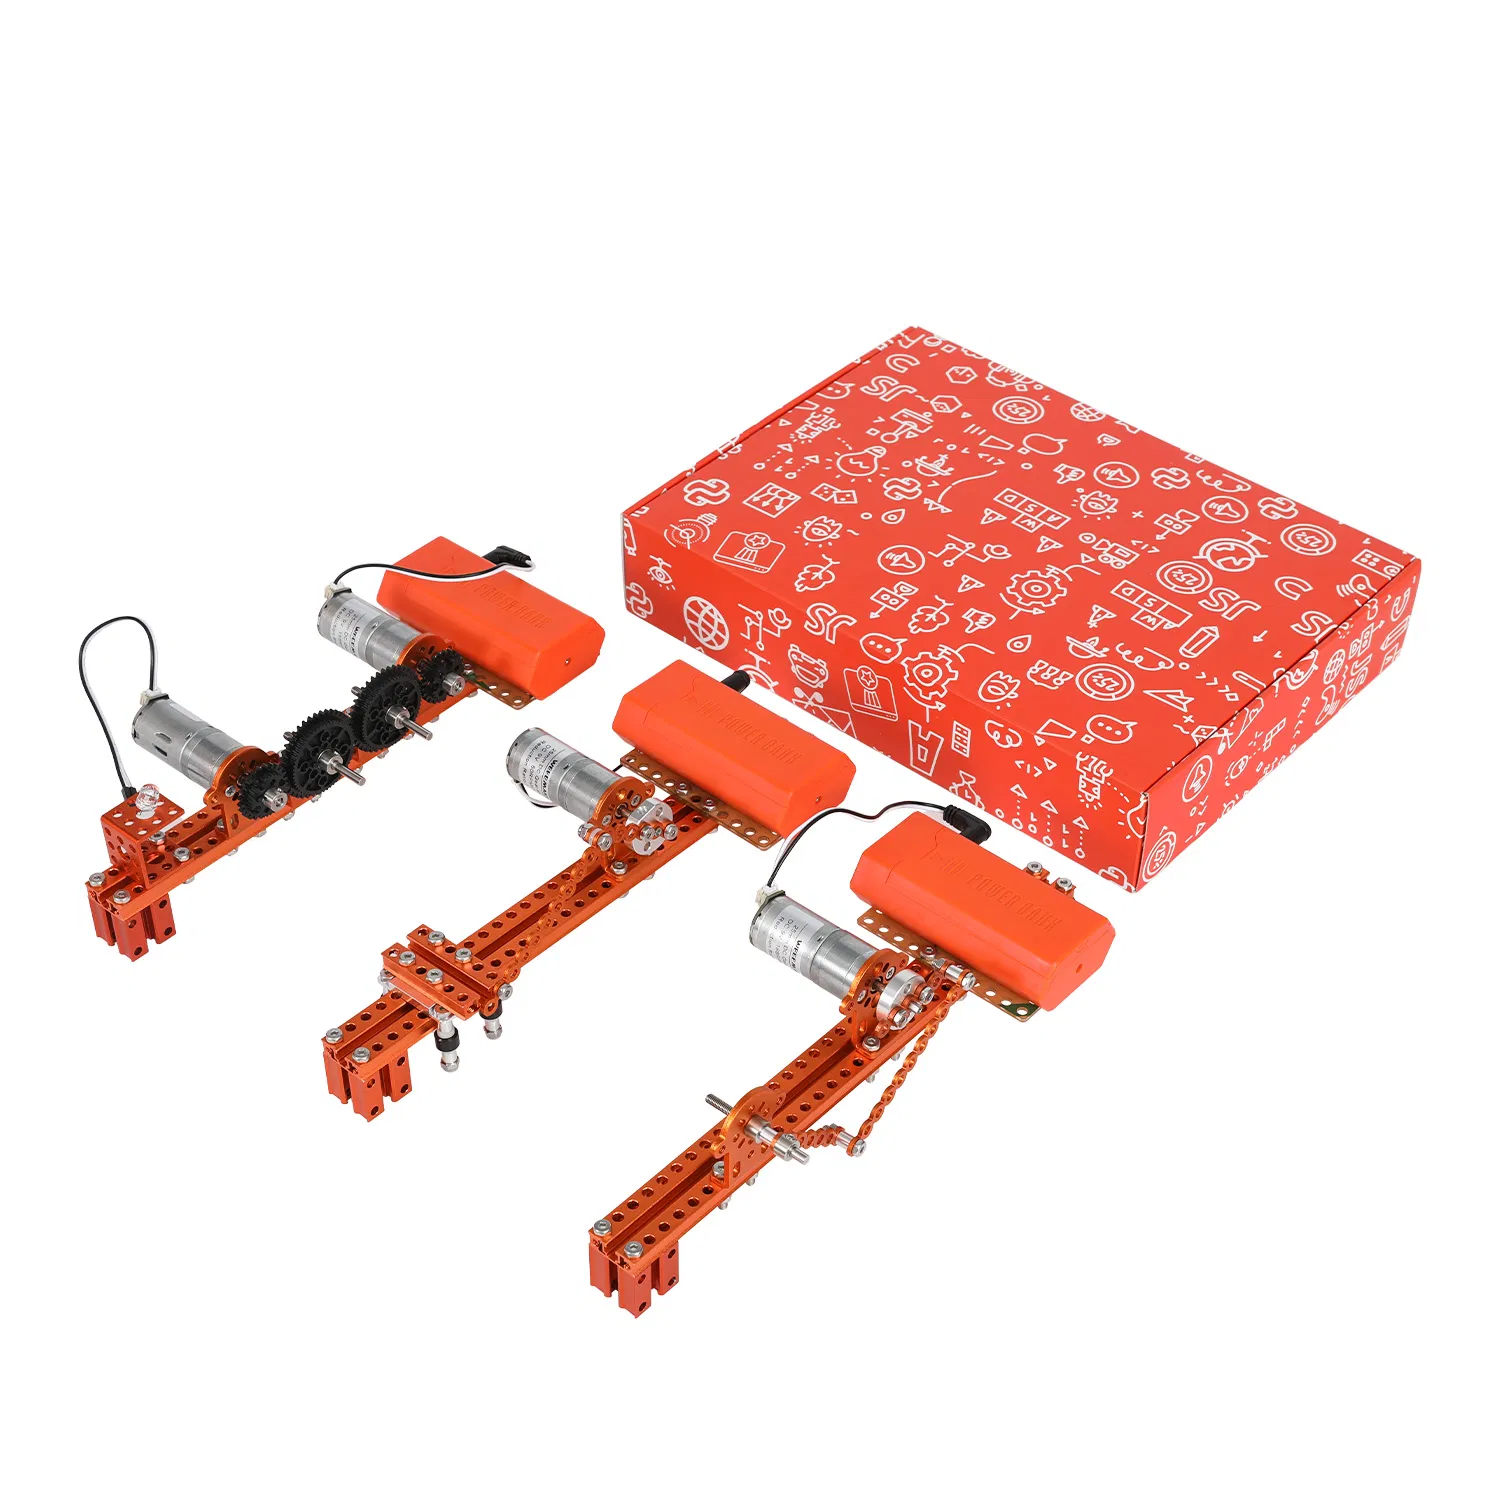
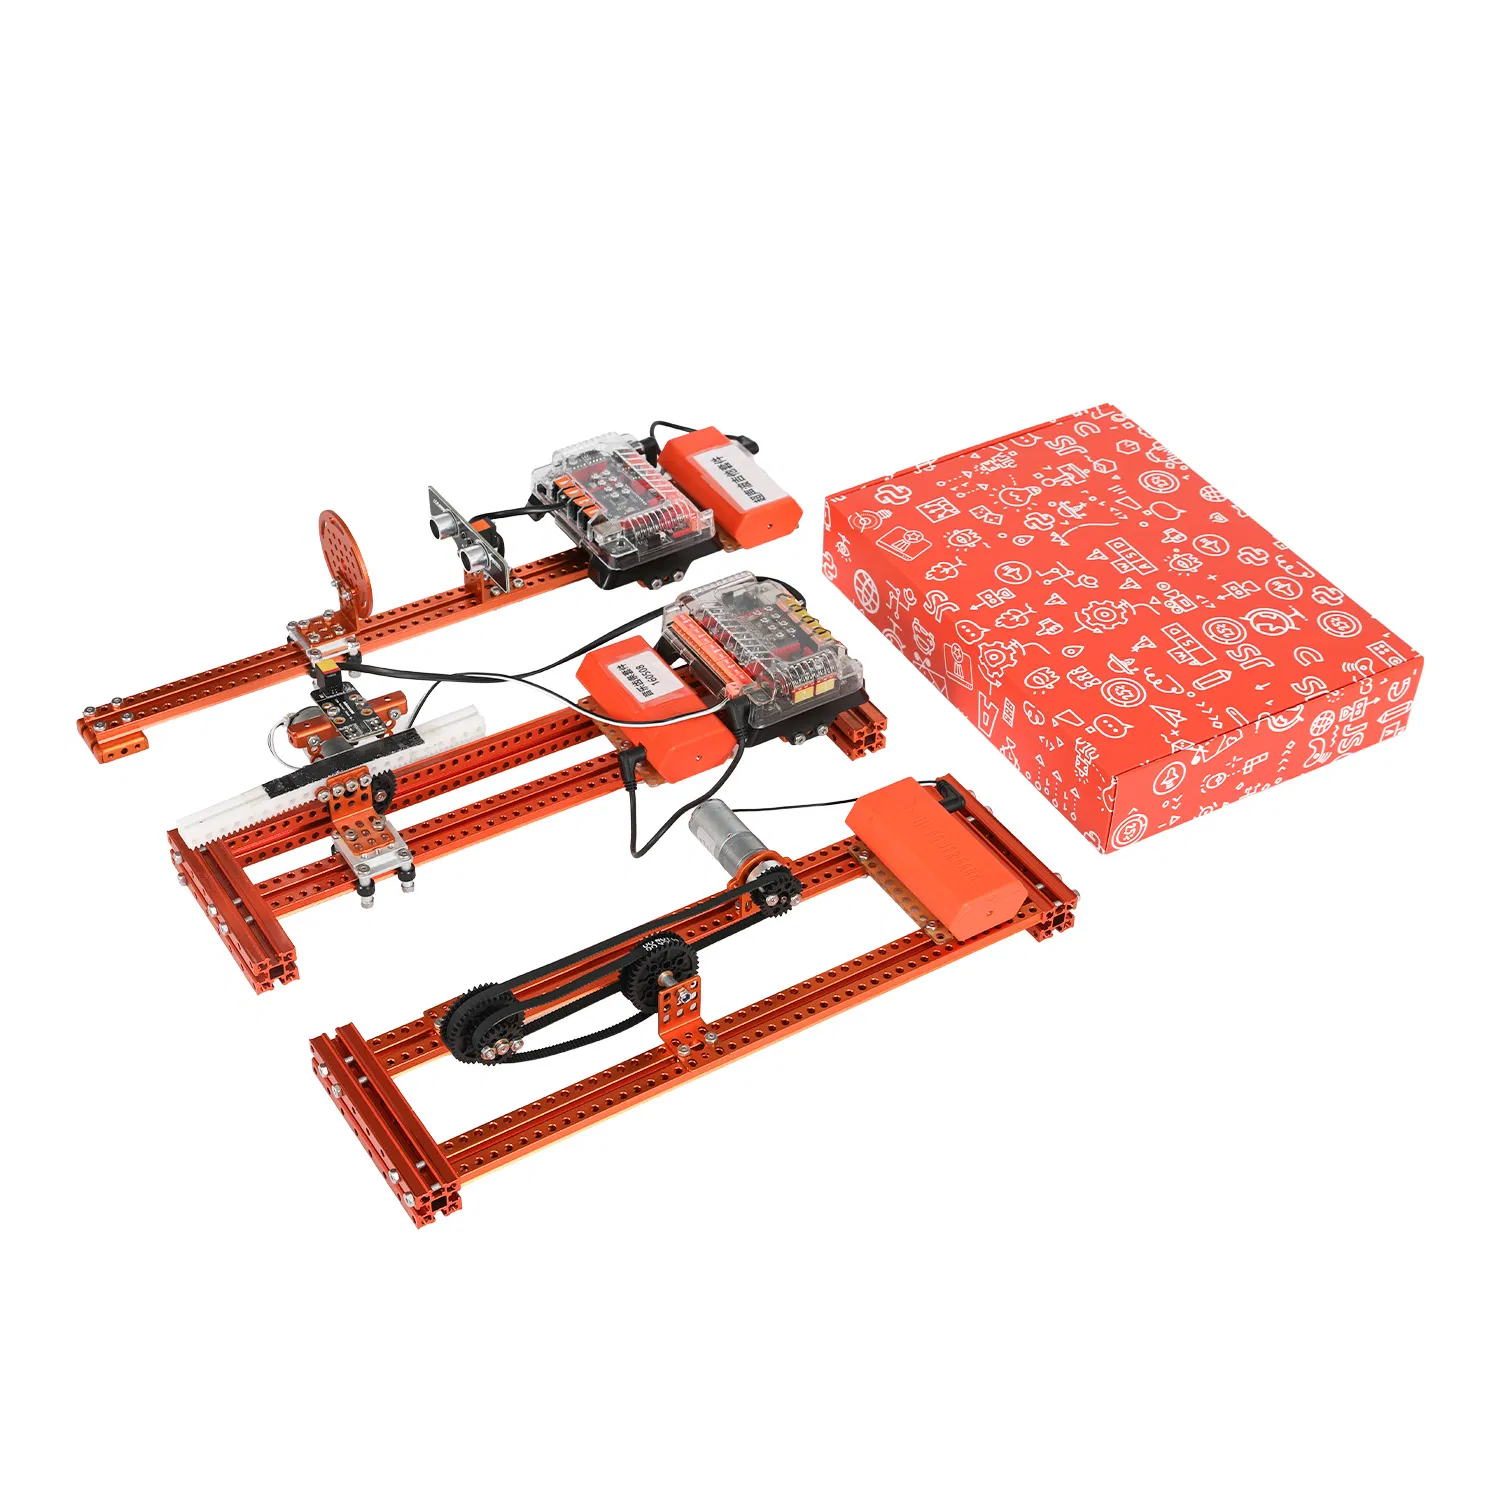
Vero Door Vero Door

9 in 1 Children DIY Science Projects Experiment Code Smart Stem Education Robotic Kit for Arduino

Still deciding? Get samples of $ !
Order Sample

Product Description

9 in 1 Science Kit
📋 Basic Info.
Model NO.
160509
Age Range
8 to 13 Years
Product Name
9-in-1 Science Kit
Application
Playing and Teaching
Feature
Building Blocks
Description
9-in-1 Educational Science Kit
Function
Mechanical Engineering Education
Wiring Method
Rj11
Package Size
49.00cm * 34.00cm * 21.00cm
Gross Weight
7.000kg
🤖 Product Description
Kit Content

9-in-1 Science Kit

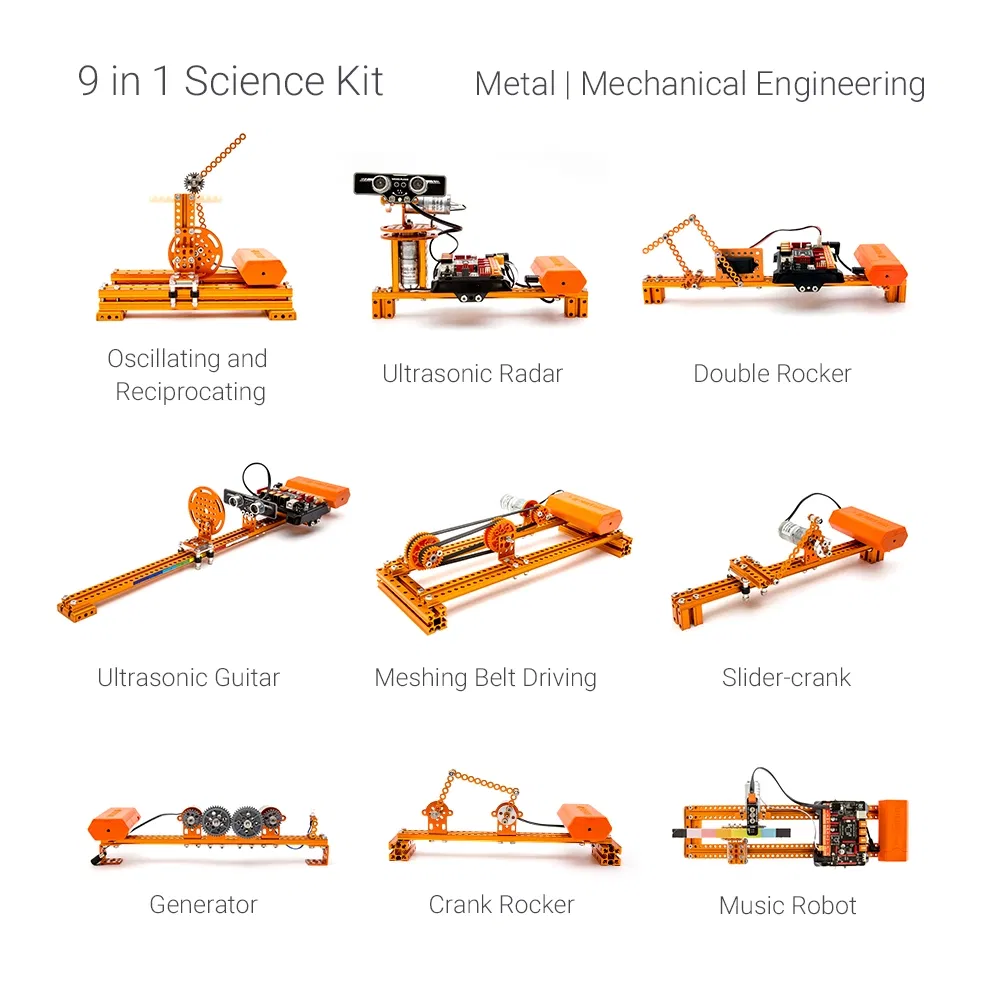
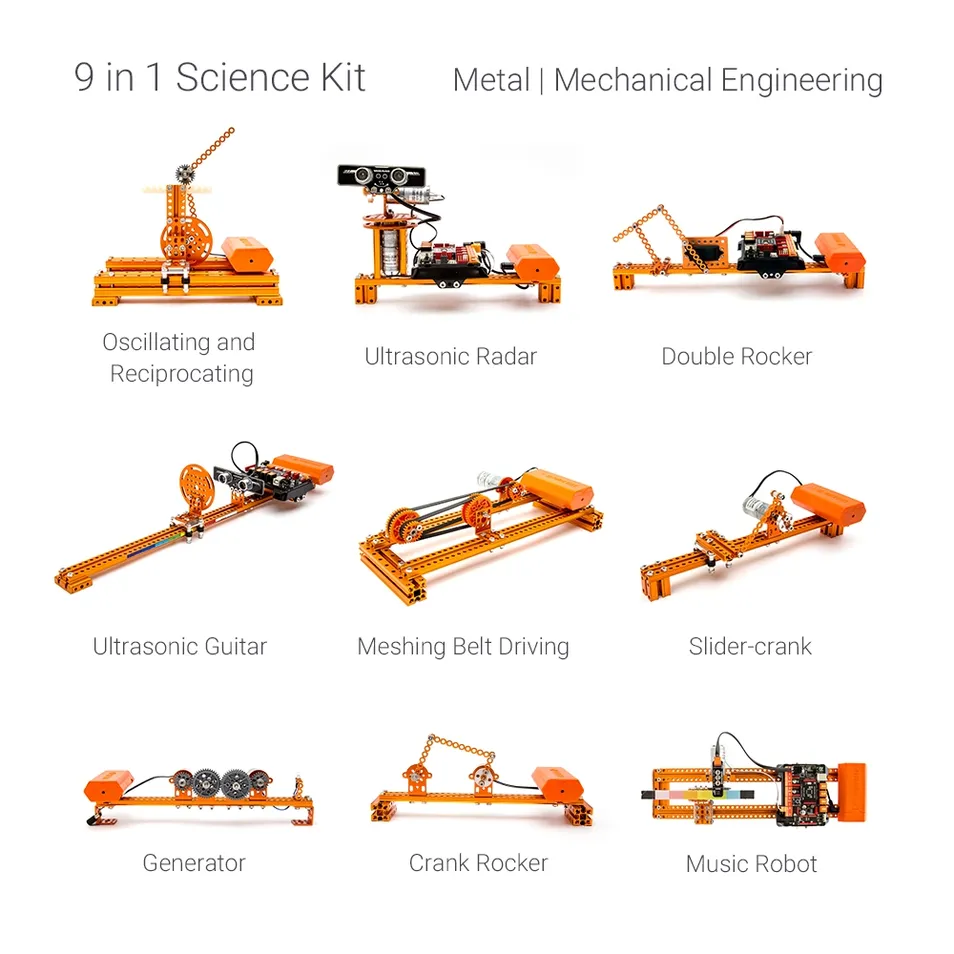
The 9 in 1 Science Kit is an educational robot DIY kit which can simultaneously build at least 9 classic STEAM application cases. Each structure is cleverly designed, simple and compact, and is closely integrated with the school's internal science and physics classes to stimulate students' scientific interest.

Crank and Rocker

Crank and Rocker Mechanism

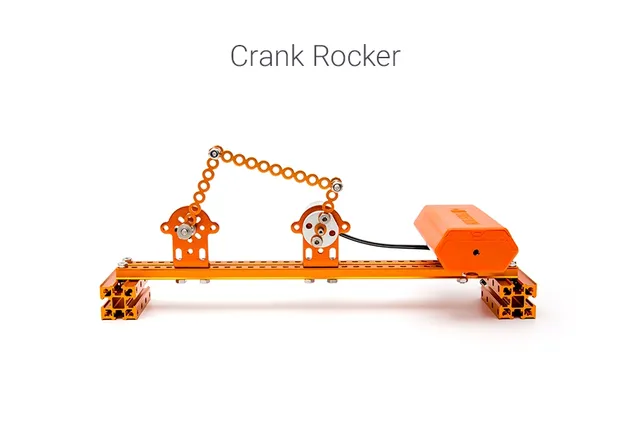
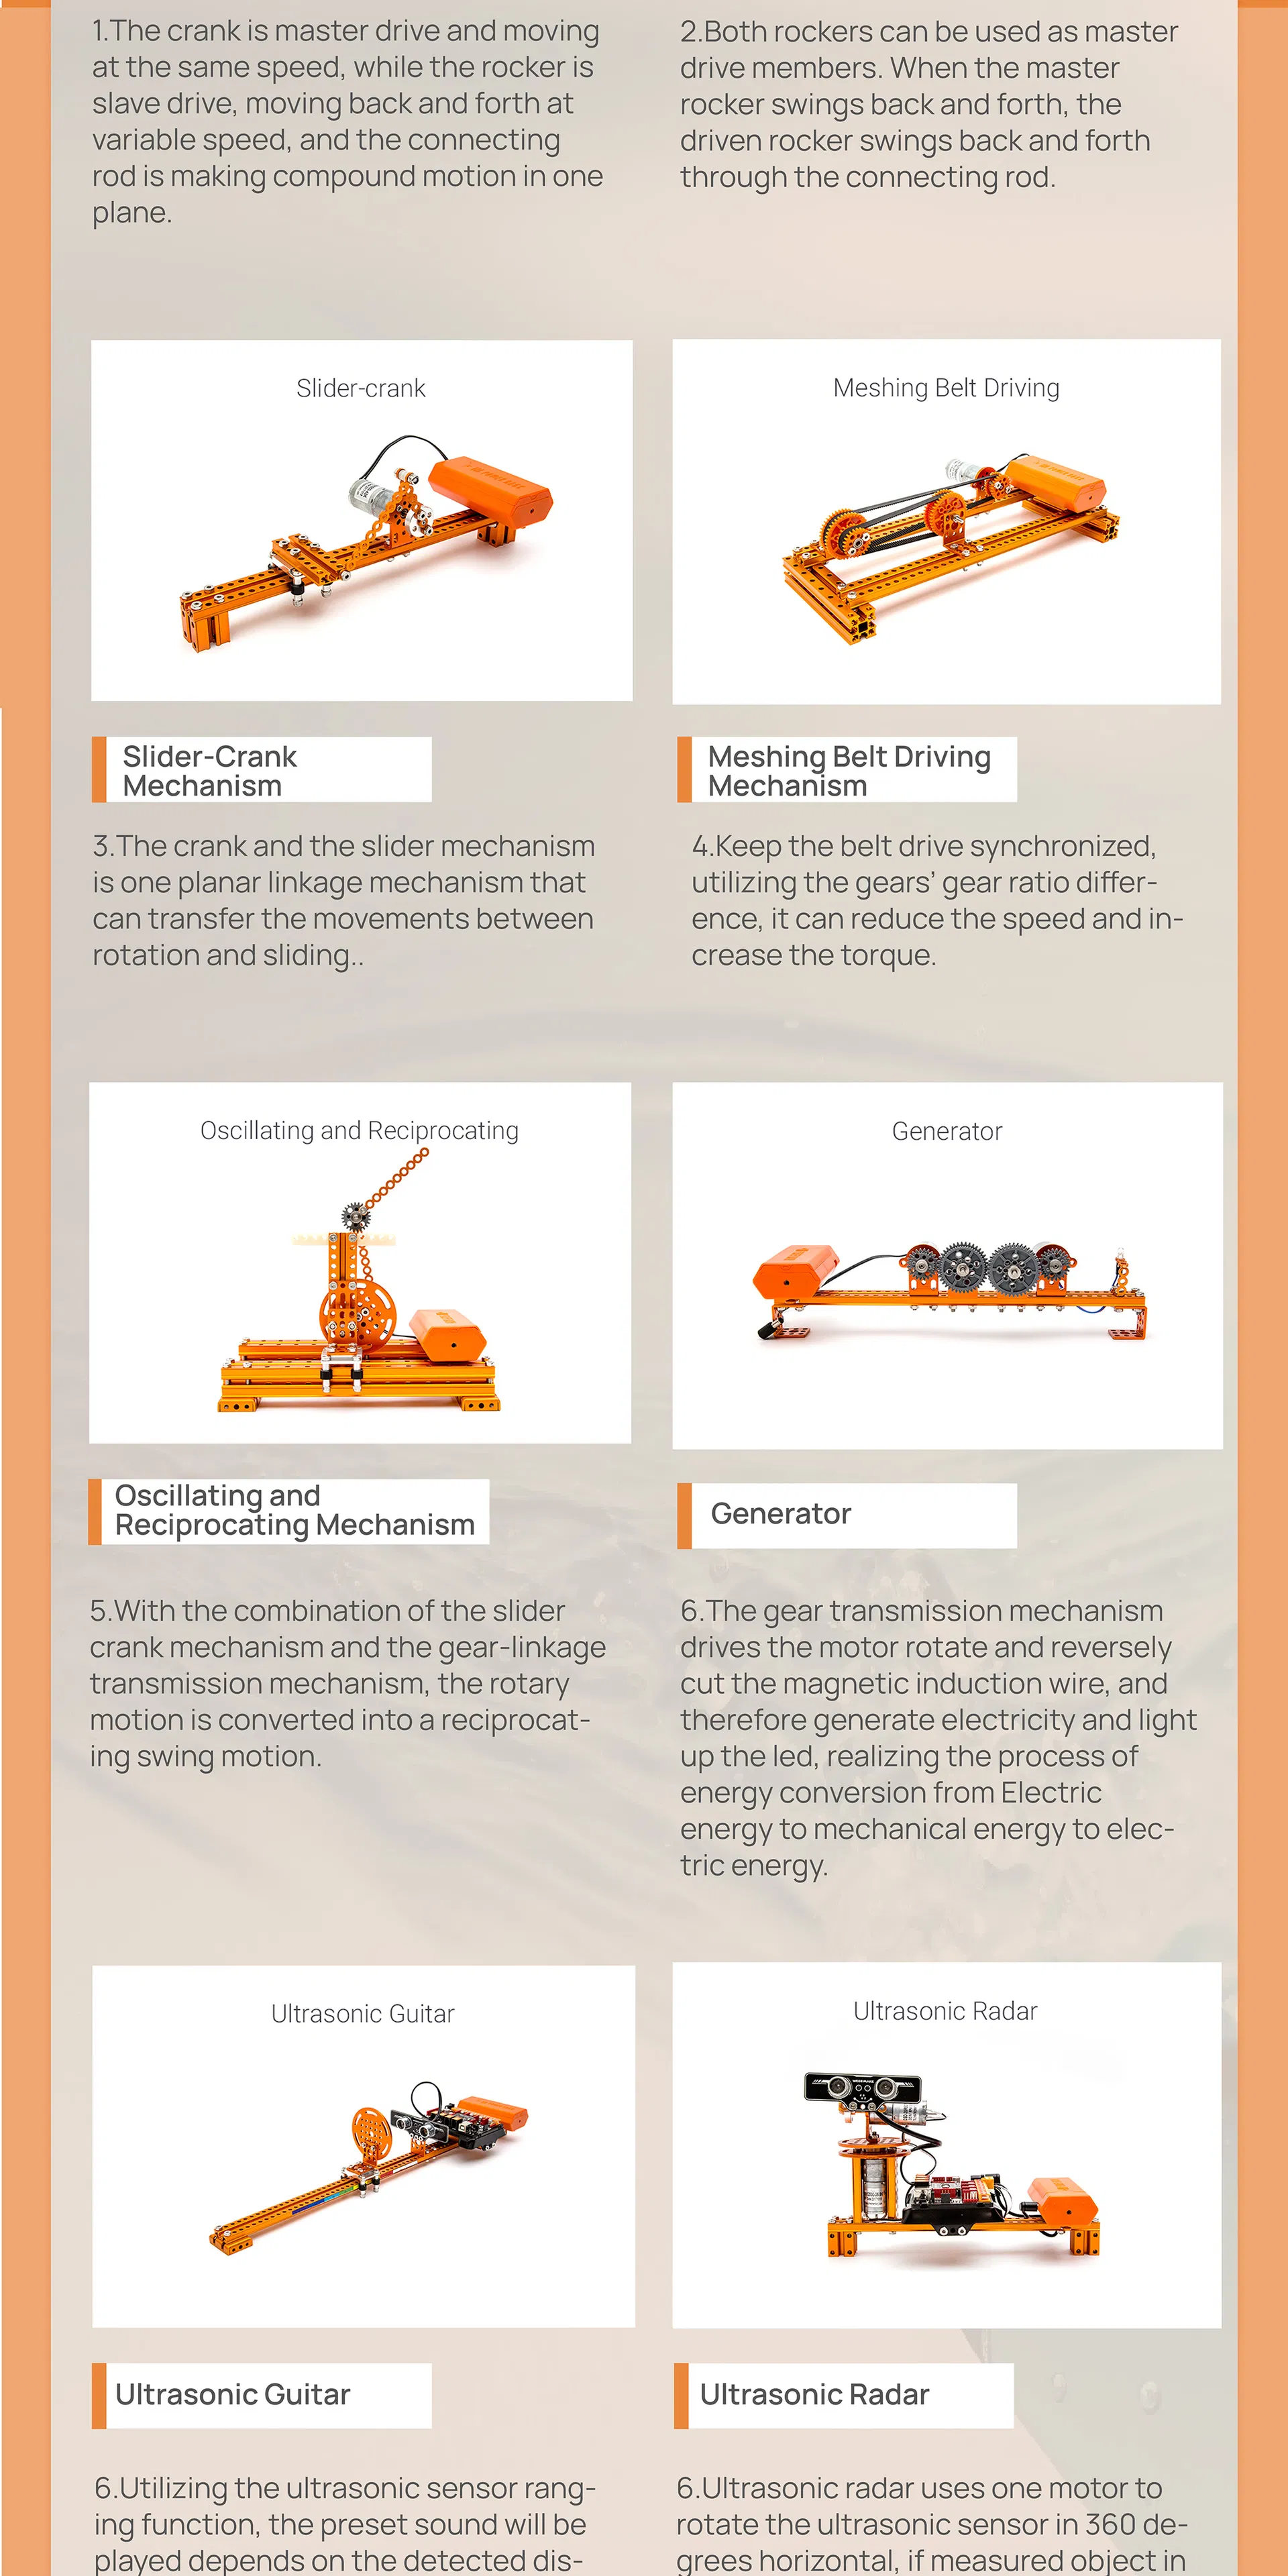
The crank is master drive and moving at the same speed, while the rocker is slave drive, moving back and forth.

Double Rocker

Double Rocker Mechanism

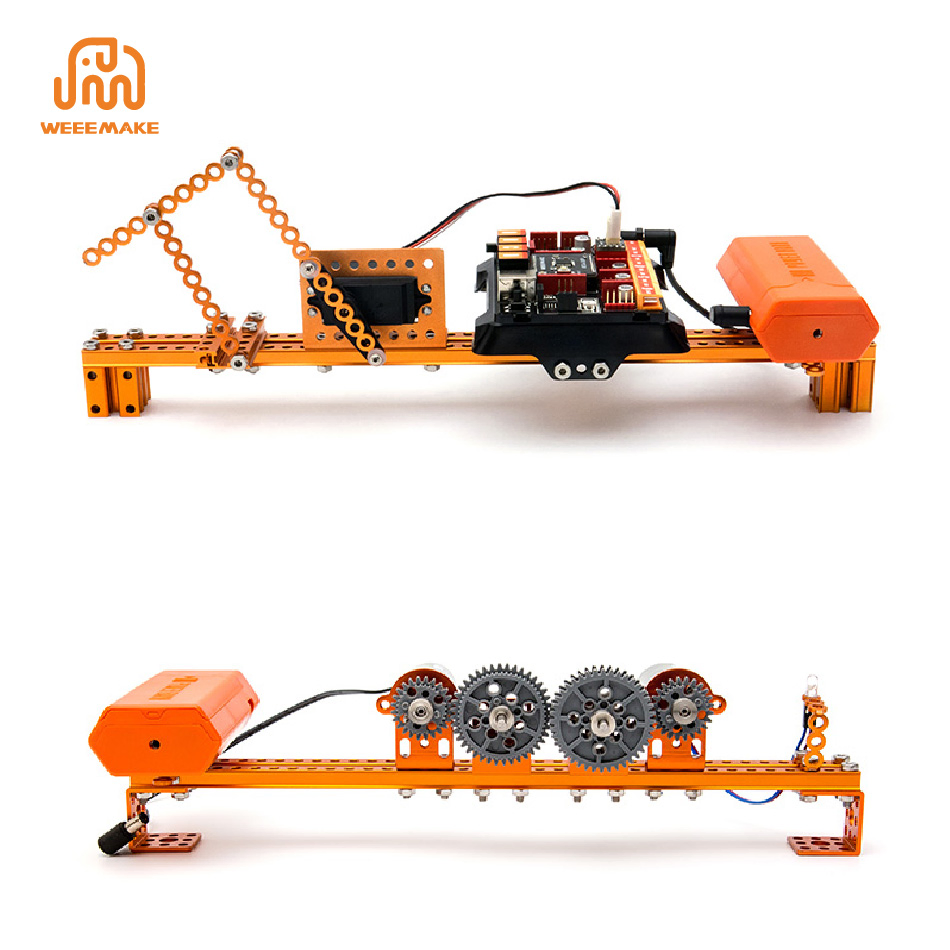
Both rockers can be used as master drive members, swinging back and forth through the connecting rod.

Slider-Crank

Slider-Crank Mechanism

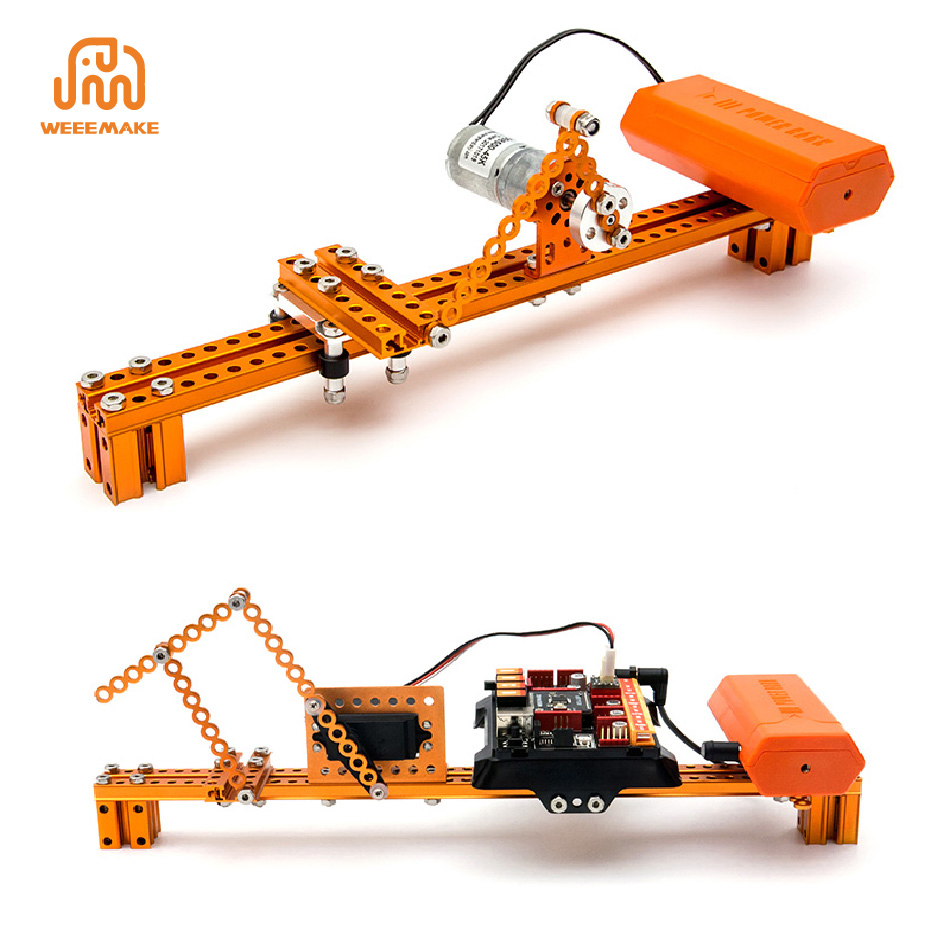
One planar linkage mechanism that can transfer the movements between rotation and sliding.

Meshing Belt

Meshing Belt Driving

Keeps belt drive synchronized, reducing speed and increasing torque utilizing gear ratios.

Reciprocating

Reciprocating Mechanism

Rotary motion is converted into a reciprocating swing motion via gear-linkage transmission.

Generator

Generator

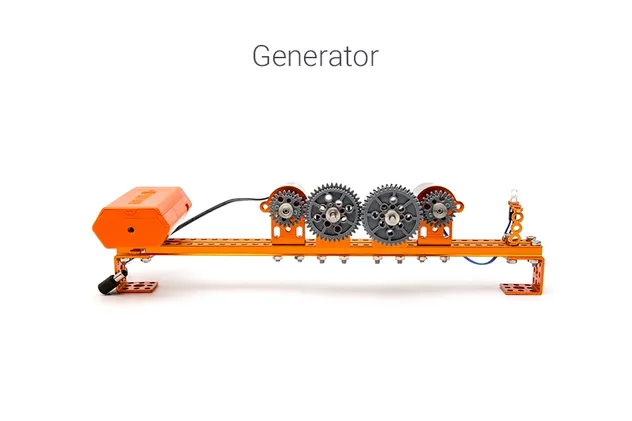
Realizing energy conversion from mechanical energy to electric energy to light up LEDs.

⚙️ Technical Features
Mainboard

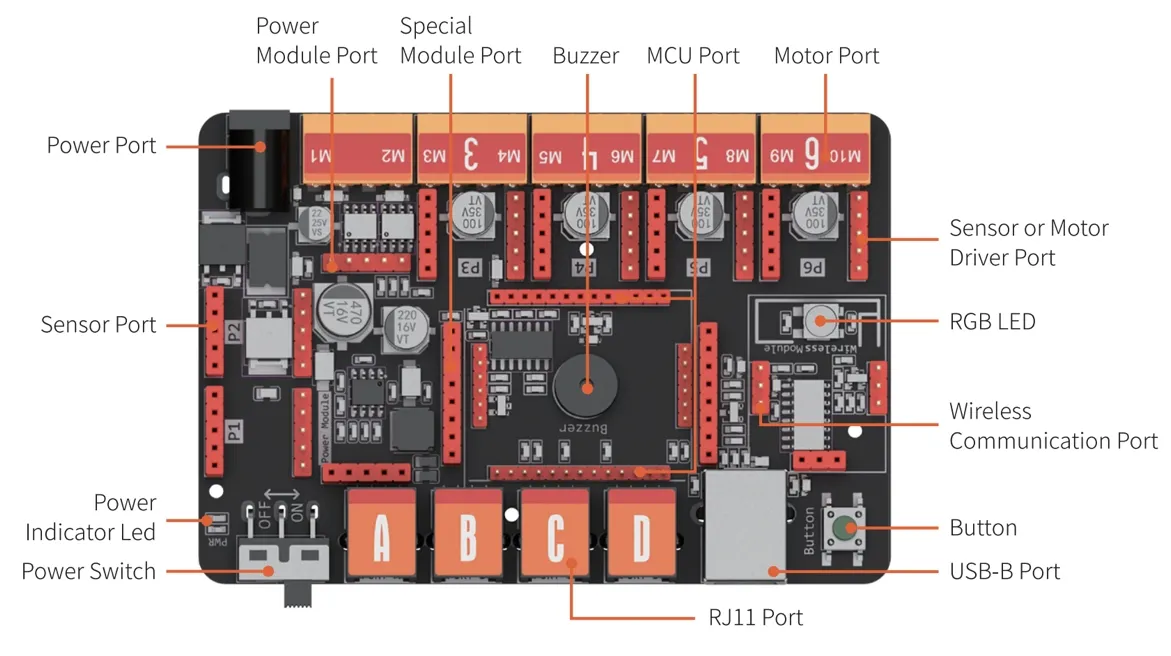
ELF Mainboard: Replaceable microchip (ATMEGA-328P, ESP32). Same port for motor driver and sensor pin port. Supports graphical programming and Arduino IDE.

  • Easy to Build: Step-by-step assembly instructions.
  • Classical Mechanism: 9 different structures with multiple motor types.
  • Visual Programming: Drag-and-drop blocks to control the robot.
📊 Specification
MicrochipATmega 328P
Ports1 x MCU port, 4 x RJ11, 2 x DC motor port, 6 x pin conversion port, 1 x USB, 1 x Communication port (Bluetooth 2.4G)
Onboard ElectronicsBuzzer, Button, RGB LED
SoftwareWeeeCode (Scratch 3.0), Arduino IDE
Detail 1
Detail 2
Detail 3
Detail 4
Detail 5
Detail 6
Frequently Asked Questions
The robot has no response after turning it on. Why?
Please check for low voltage and recharge or replace batteries. Ensure batteries are installed with the correct polarity (+/-) and check for any incorrect wiring on the battery holder or motor.
The robot moves backward when controlled to move forward. How to fix it?
The wiring of the motor is likely connected in reverse. Please reconnect the motor wires to swap the direction.
How can I restore the factory settings or program the robot?
Download the compatible software, connect the robot via USB, and select the correct serial port. Use the "Restore Firmware" menu to choose between Online, Factory, or Mobile firmware options.
Why won't the robot move when connected only via USB?
USB power supply only supports the mainboard chip and sensors. To drive motors or servos, you must connect batteries and switch on the power button.
The Line-following Sensor is not working correctly. What should I check?
Ensure the distance between the sensor and the map is 1-2cm. Avoid strong ambient light which interferes with the sensors, and use non-reflective material for your tracking path.
What if the software cannot read the sensor values?
Check your physical wiring and ensure the sensors are connected to the exact ports defined in your programming software.

Related Products