Vero Door
Installing a smart lock on an old wooden door can seem simple, but aged timber often hides small problems. The door may sag, swell, or contain uneven cutouts from a previous lock. How to install a smart lock on an old wooden door? The answer begins with careful inspection, not drilling. Check the door thickness, backset, hinge alignment, and available clearance around the frame. Read the smart lock’s official specifications before buying it.
I have worked with older wooden doors where the surface looked solid, yet the interior had softened near the lock hole. A small screwdriver and firm pressure can reveal weak wood. My first test was not perfect. I measured from the wrong edge and nearly created an off-center opening. That mistake showed why templates should be attached securely and checked twice. Measure twice.
This guide will explain the installation process in practical stages. It will cover removing the existing hardware, reinforcing fragile wood, positioning the mounting plate, and connecting the interior mechanism. It will also discuss batteries, keypad setup, phone pairing, and manual key access. Professional installers recommend testing the deadbolt with the door open before closing it. This prevents accidental lockouts during setup. Keep the original hardware nearby. It may help if the smart lock proves incompatible.
Older doors deserve patience. Do not force the motor or enlarge holes without checking alignment. A clean fit matters more than speed. Some steps may vary between brands, so the manufacturer’s instructions remain authoritative. With realistic measurements, suitable tools, and repeated testing, a traditional wooden door can gain modern convenience without losing its character.
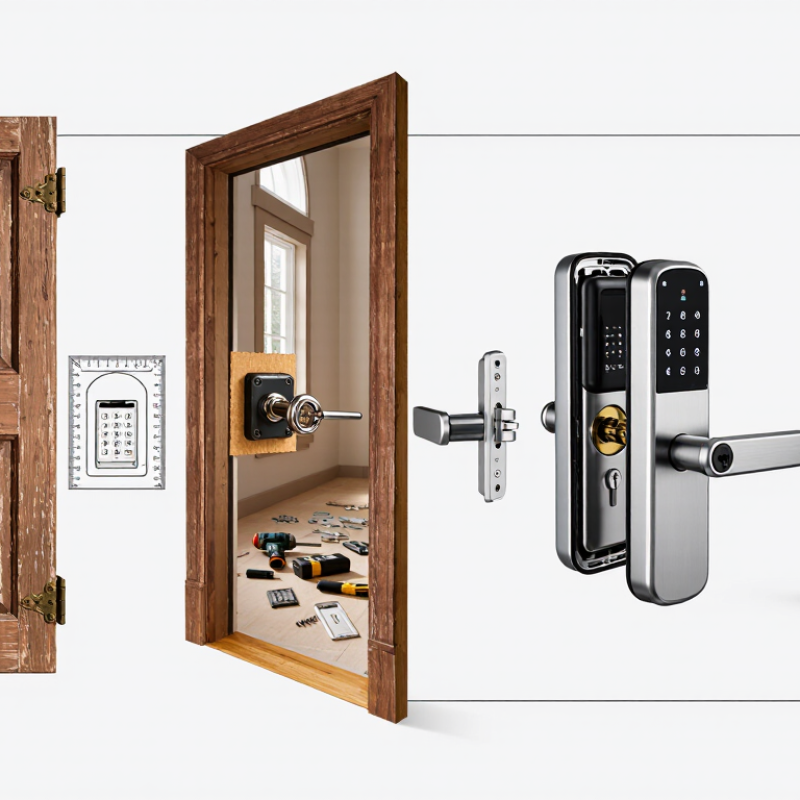
An old wooden door needs careful measuring before any smart lock purchase. Measure the door thickness, backset, and existing bore-hole diameter. The backset is the distance from the door edge to the cylinder center. Small differences matter. A lock may appear suitable but fail to reach the strike plate.
Inspect the current deadbolt or latch for damage, rust, and loose screws. Check whether the door closes smoothly without pushing or lifting. Test the gap around the door, especially near the hinges. Uneven gaps can prevent the motor from turning the bolt. Measure the interior space too. Some older doors have narrow trim that blocks a large indoor housing. A retrofit design may work better than replacing the entire lock.
On one wooden door, the measurements matched, but the bolt was slightly bent. The smart mechanism stalled during testing. Replacing that small part fixed the problem. Before installation, compare the lock’s required dimensions with your measurements, not just the product photo. Confirm that the included strike plate fits the old frame, or plan a careful adjustment. Avoid removing excess wood. It can weaken the door and create alignment problems. After mounting the lock, operate it manually several times. Then test electronic operation with the door open. Keep a physical key available while checking settings, access codes, and battery placement.
Gather Tools and Prepare the Old Wooden Door
Before installing a smart lock, inspect the door like a technician. Bring a tape measure, pencil, level, screwdriver, drill, sharp bits, chisel, wood filler, sandpaper, and a flashlight. Keep fresh batteries nearby. Measure the door thickness, backset, edge bore, and clearance around the frame. Record every measurement.
Old wood often hides movement. Check for cracks, soft patches, loose hinges, and a warped edge. Close the door slowly. The latch should enter the strike without force. If it scrapes, correct the alignment before drilling. A level helps, but your fingertips also reveal uneven surfaces. I once trusted a visual check alone. That was a mistake.
Remove the existing lock carefully, saving each screw until the new fitting matches. Fill abandoned holes with suitable wood filler, then sand the surface flat. Do not enlarge the bore automatically. Excessive drilling can weaken thin timber and create an unstable mounting area. ANSI/BHMA A156.40 provides performance requirements for electronic residential locks, so follow the lock’s measured installation limits rather than guessing.
Seal small gaps around the frame after confirming operation. ENERGY STAR guidance estimates that air sealing can reduce annual heating and cooling costs by up to 20 percent. Use compatible weatherstripping, but avoid pressure that prevents smooth latching. Leave the door closed for several minutes. Wood may shift after sanding, especially in damp weather.
Gather the tools and check these common door measurements before installation. Actual dimensions may vary by lock design and door construction.
Use a tape measure, pencil, screwdriver, drill, hole saw, chisel, level, and safety glasses. Confirm the backset, bore diameter, edge bore, and door thickness before drilling or modifying the old wooden door.
How to Install a Smart Lock on an Old Wooden Door in 2026?
Remove the Existing Hardware Without Damaging the Door
Before installing a smart lock, remove the old hardware patiently. Old wooden doors often hide painted screws, swollen timber, or brittle latch plates. The U.S. Department of Energy notes that doors and windows can represent up to 30% of residential heating and cooling energy use. Protecting the door’s fit still matters.
Open the door and support it with a wedge. Photograph each component before removal. Use the correct screwdriver, not a drill, for the first turn. Press firmly into the screw head, then rotate slowly. If paint seals the plate, score its edge with a sharp utility knife. Do not pry against the wood. Instead, slide a thin plastic card beneath the plate and lift gradually.
Remove the interior knob, exterior trim, latch, and strike plate in that order. Keep every screw in a labeled container. Some old screws are different lengths. That detail can matter later. If a screw refuses to move, apply a small amount of penetrating oil and wait several minutes. Avoid excessive force; I once split a door edge by rushing this step.
ANSI/BHMA A156.2 covers common cylindrical lock dimensions, but older doors may not match them perfectly. Measure the backset, bore diameter, and door thickness before ordering replacement hardware. Check the wood around each hole for cracks. Small gaps can often be repaired, but badly enlarged holes may need professional reinforcement. I would rather pause than turn a simple upgrade into permanent damage.
Before installing, inspect the old wooden door for swelling, cracks, and loose hinges.
A smart lock cannot correct a sagging door. Measure the existing backset and confirm the new latch fits the edge bore.
In my experience, this check prevents most installation problems.
Keep a screwdriver, tape measure, pencil, and a small level nearby. Turn off the door’s automatic closing device, if fitted.
Remove the old lock and clean dust from the holes.
If the wood feels soft, add a solid reinforcement plate before mounting the new latch. Set the latch with its angled face pointing toward the frame.
Attach the exterior keypad or sensor, then connect the interior mounting plate without pinching the cable. Tighten each screw gradually.
Over-tightening can distort an old door.
Install fresh batteries and pair the lock with its control application.
Create an administrator code, then add temporary users only when necessary. Keep a physical backup key in a secure, lawful location.
Run the calibration cycle with the door open, allowing the deadbolt to extend and retract freely. Test it several times with the door closed.
My first test once failed because the strike plate sat two millimeters too low.
A thin adjustment solved it. Check locking from inside, outside, and during a power interruption.
Record the setup date and inspect the screws after one week.
After installing a smart lock on an old wooden door, test its security before relying on it daily. Close the door slowly and check whether the bolt enters the frame without scraping. Old wood can swell, shift, or hide weak areas around the strike plate. Tighten loose screws, but avoid over-tightening them. It may split the timber.
Test every approved entry method, including the keypad, physical key, interior thumb turn, and emergency power contact. Try the lock with the door slightly misaligned. A secure lock should resist forced movement, while still opening smoothly when authorized. Check the tamper alarm by entering several incorrect codes. Keep this test controlled and brief. Record which alerts appear in the app or on the lock.
I once tested a new lock with the door open and missed a serious alignment problem. That mistake was embarrassing, but useful. Test again with the door fully closed.
Update the firmware through a trusted network, use a unique access code, and remove unused guest permissions. Review access history each month. Replace batteries when the warning appears, not after failure. Wipe dust from the keypad with a dry, soft cloth. Do not spray cleaner into the mechanism. Inspect the bolt and hinges every few months. If the door begins sticking, repair the wood or alignment before blaming the lock. A smart device cannot compensate for a weak frame.
Prepare a tape measure, pencil, level, screwdriver, drill, sharp bits, chisel, filler, sandpaper, and flashlight. Keep fresh batteries nearby.
Measure door thickness, backset, edge bore, and frame clearance. Write every number down. Guessing causes avoidable problems.
Look for cracks, soft wood, loose hinges, and warped edges. Close the door slowly. The latch should enter smoothly.
Correct the alignment before drilling. Check the hinges, frame, and strike position. A level helps, but fingertips notice uneven surfaces too.
Photograph each part before removal. Use the correct screwdriver and turn slowly. Score painted edges instead of prying them apart.
Apply a small amount of penetrating oil and wait several minutes. Keep steady pressure on the screwdriver. Rushing can split the door edge.
Confirm the latch fits the existing bore. Set its angled face toward the frame. Tighten screws gradually. Over-tightening can distort old timber.
Install fresh batteries and calibrate with the door open. Test locking several times with the door closed. Check both sides and during power loss.
Do not enlarge the bore automatically. Excessive drilling weakens thin wood. I once trusted a visual check alone. That was a mistake.
Keep a physical backup key in a secure, lawful location. Seal small frame gaps after testing. Use weatherstripping that does not prevent smooth latching.
How to install a smart lock on an old wooden door? Start by checking the door’s thickness, frame alignment, hinge condition, and existing lock dimensions to confirm that the new device will fit securely. Gather basic tools such as a screwdriver, measuring tape, pencil, drill, and protective equipment. Before installation, inspect the wood for cracks, warping, or loose sections, and reinforce weak areas if necessary. Carefully remove the existing lock and handles, keeping the door and surrounding finish undamaged.
Next, follow the lock’s installation instructions to position the interior and exterior components, connect the mounting parts, and install the batteries. Set up access methods, security codes, and optional mobile controls according to the device instructions. Test locking, unlocking, manual operation, door alignment, and emergency access several times before relying on it. In 2026, regular maintenance remains important: tighten loose screws, replace batteries promptly, keep the mechanism clean, and review access permissions to help ensure dependable security.
